Tag Archives: warm up

The biggest win of my career: Longines FEI World Cup at Olympia

Facebooktwitterredditpinterestlinkedinmail


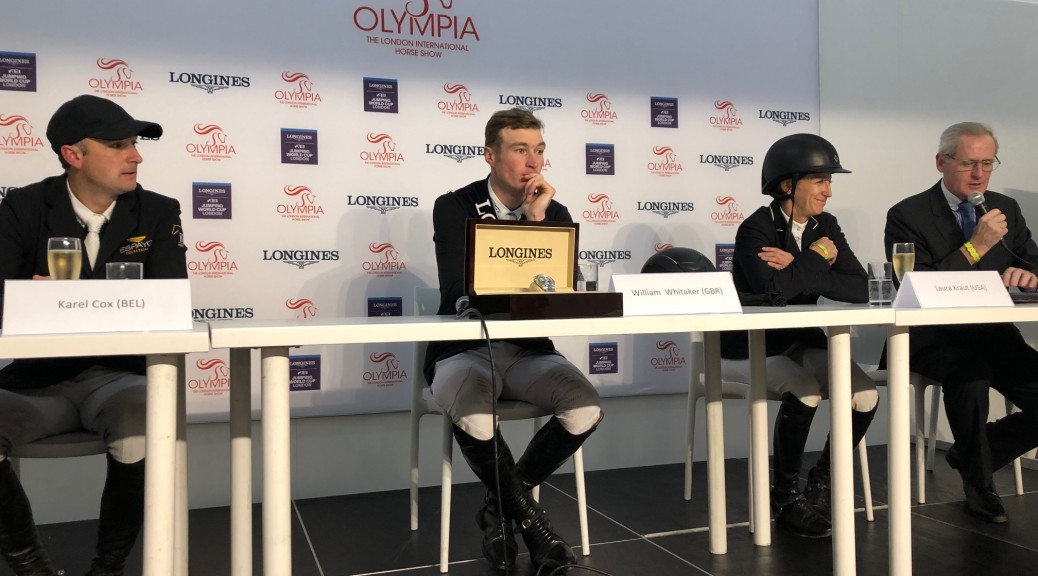
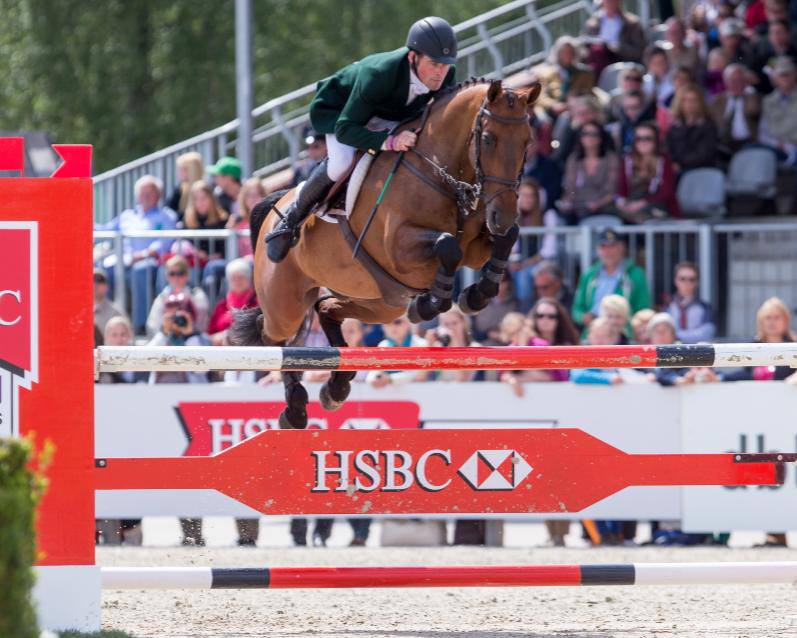
British rider William Whitaker celebrated the biggest win of his career after claiming the Longines FEI World Cup Final at Olympia yesterday. Fighting back tears he said “This is the one class I think about every day. I’ve been coming here since I was two or three years old and to actually win it is a dream come true. To us British riders, the World Cup here is like a Championship and you only get one shot at it, a year. I have been thinking about it for a while and decided if I was clear, I wouldn’t hold back in the jump-off.”


Riding the stallion Utamaro D Ecaussines, who he partnered at the World Equestrian Games in North Carolina earlier this year, William posted the fastest clear in the jump off. “I knew I had done a good round but when I looked down at the list and it was the best riders in the world left to jump, I didn’t think it was possible.  It helps that I was on such a horse. He has such a good brain and mentality. He was nearly falling asleep in the warm-up but he just lights up and grows a hand when he gets in the arena. We’ve had loads of fantastic performances but we’ve never managed to win a Grand Prix so to win one and it be this one on homer turf, is so special.”


The 29 year old from Huddersfield, is of course part of showjumping’s most successful family. Both his uncles John and Michael together with his cousin Robert Whitaker were competing in the World Cup yesterday. His uncle Michael was next best Brit, finishing in 4th place. “I have memories of my uncles jumping here,” William said. “The thought of winning the World Cup was one of those things that got me out of bed in the morning.”


Belgian rider Karel Cox claimed second place and America’s Laura Kraut finished third. Laura was one of five female riders competing, all of whom got through to the jump off, including Britain’s Laura Renwick.


PREPARING FOR BADMINTON: EXCLUSIVE INSIGHT

Facebooktwitterredditpinterestlinkedinmail

Horse Scout catches up with two of their sponsored riders, Joseph Murphy and Gubby Leech, to find out what the month prior to riding at Badminton involves.


Most event riders grow up dreaming of riding at the prestigious Badminton Horse Trials, based in the heart of the Cotswolds. It takes years, sometimes decades of training and hard graft to reach the required 4* level and earn those elusive FEI points to be applicable to enter.

Horse Scout asks two of their sponsored riders, Joseph Murphy and Gubby Leech to provide insight into the one month leading up to the big event.


The horse’s training

Joseph Murphy, Irish Olympic event rider, is entered to ride Sportsfield Othello, a 16 year old gelding by Ricardo Z and out of Moyview Lady and co-owned with the brilliantly supportive Alison Schmutz.

Joseph explained that the first two weeks of April are focused on reaching the horse’s fitness goals with a mixture of galloping and swimming to build cardiovascular fitness and stamina. He gallops ‘Frankie’ every 3rd and 5th day followed by a swim and always icing the legs afterwards to reduce inflammation and prevent injury. In fact, Joseph ices the legs of all his horses after they are ridden each day. This fortnight is a ‘scary time for injuries’ said Joseph, and when you would look to do any necessary veterinary work to ensure the horse is in optimal condition.

This intense fitness work will then taper right down and the last two weeks of April focus on technical training, practising dressage movements from the test, agility jumping and specific exercises to fine tune the horse.

jm2

Gubby Leech, British 4* event rider, is entered on Antoinette Denham-Harding’s 12 year old ISH gelding Xavier, by Clover Echo and out of Knightfield Sally.

Gubby is based at the quiet and beautiful Clarendon Park Estate in Wiltshire. He does all his fitness training on the forgiving old turf in the grounds of the estate. There is a perfectly steep hill that Gubby does repetitions galloping up and letting Xavier rest on the way down. They do fitness work every four days and will have their last gallop on the Saturday before Badminton week, with a ‘pipe opener’ after dressage on the Friday afternoon. Gubby said ‘Xavier is a strong and electric horse’ so he puts a lot of work into him to keep the extra fizz to a minimum! The technical training involves weekly dressage training with Lizzie Murray throughout April and showjumping training with William Fox-Pitt. Xavier is a keen horse in the ring, sometimes making up too much ground in combinations. Practising grid exercises at home helps him to shorten his stride in doubles and trebles, especially if the course builder likes to use short distances.

gubby2

The horse’s well-being

Joseph will turn ‘Frankie’ out every day on his own so he can have a pick of grass, relax and feel the sun on his back. Joseph chooses not to put protective boots on when turning Frankie out because he tends to be sensible in the field and he would rather keep the legs cool. Regular massages and some physiotherapy throughout April also help get Frankie in the best physical condition possible.

Gubby entrusts the multi-skilled Sue Devereux to keep Xavier in good condition. Sue is an equine vet, chiropractor and acupuncturist who will treat Xavier 2-3 times this April using a variety of techniques. In the stable, Xavier wears a magnetic rug and magnetic boots to optimise blood flow and recovery. He is turned out ‘bootless’ from the time he is ridden in the morning until 8pm when the horses get late feeds. This turnout time helps Xavier chill out and unwind.

Feeding

Joseph is very intuitive and he judges visually and by the feel of the horses on whether their feed needs increasing or decreasing. He monitors each horse closely to ensure it is fed the right mix of hard feed, haylage and supplements. Joseph slightly increases the feed on Frankie’s hardest days of work. Two weeks before Badminton Frankie’s feed regime will be set and won’t change leading up to the event. Joseph uses top quality feeds, Mervue supplements and he brings his own haylage over to Badminton from his base in Northern Ireland.

Like Joseph, Gubby also uses quality supplements to support the nutritional requirements of his horses.  Gubby uses an organic lucerne which is soaked first and helps keep Xavier hydrated, in addition to using high quality linseed, a balancer and electrolytes. Xavier receives 3 feeds a day whilst having his weight, condition and energy closely monitored. He can very quickly go off his food at competitions so it is a fine art making sure he gets what he needs!

jm3

Rider Fitness

Joseph rides all day long from the moment he wakes to the end of the day. He regularly competes 5 horses a day, even at Intermediate and Advanced level, meaning he is extremely fit from his time in the saddle. However, Joseph does extra core stability exercises to help improve his position, balance, core and overall fitness. He is following a 6 week core stability programme and he does the exercises before bed. Did you ever wonder what gives Andrew Nicholson, otherwise known as ‘Mr Stickability’ his amazingly secure seat? The answer is having a rock solid core.

Gubby is in the saddle riding horses back to back all day until the moment he gets home. Having two young children means most of his evening is spent overseeing bath-time and coaxing them to go to sleep! Gubby focuses on eating as healthy as possible, cutting out sugar and only has the occasional drink at special occasions, in order to maintain his perfect competition weight. His wife Sarah is an organic girl so the family gets fed very well!


Rider Mindset

Gubby has previously entered Badminton twice but sadly had to withdraw the horses before the event on both occasions. Combining this with a good Burghley experience in 2016 for this duo, Gubby feels ready. He is ‘in a good space, riding well and has a good partnership’ with his ride, Xavier.

gubby

Increasingly, top athletes are using Sports Psychologists to help give them the competitive edge. People talk about ‘marginal gains’ and this simply means that if you have a group of athletes, in this case riders, who are all equally talented on paper with equally talented horses, the rider who wins is the person who performs best on the day. Good sleep and being well rested, thriving under pressure, feeling confident, and focusing only on your performance and not worrying about those around you, are all factors that determine a rider’s overall performance. Doing these things well can make all the difference.

Joseph works with Charlie Unwin, Olympic Performance Psychologist across five sports. Since working with Charlie at the start of 2017, Joseph has been out winning most weekends this season and has never looked better! The work with Charlie helps Joseph to focus on what matters most when it comes to performance and to successfully block out all other distractions.

Horse Scout would like to thank Joseph and Gubby for sharing some of their practises and we wish them the best of luck for May! We look forward to an exciting four days of competition and wait in anticipation to see the new cross country course designed by Eric Winter. Only one question remains- who will be holding the famous Badminton trophy come Sunday afternoon?


Are you a member of Horse Scout yet? Sign up now for FREE www.horsescout.com


Stabilising Pilates for your stable

Facebooktwitterredditpinterestlinkedinmail

Horse Scout Blogger is a great fan of Pilates as a way of increasing and maintaining good core strength. Using Yoga or pilates type exercises to improve fitness are as useful for your horse as for you.  Theses are exercises which have been adapted to take into account your horses structure.

  1. Core Strength

Core strengthening exercises strengthen and stabilise the spine and pelvic muscles as the horse responds to pressure over specific areas. If you have strong hands, you can apply pressure manually; if not, use a metal thimble over your thumb or finger. Perform three to five repetitions, allowing the muscles to relax for a few seconds after each exercise. Some horses, especially those that are girthy or cold-backed, may resent certain procedures. If resentment persists, omit the exercise until you’ve consulted with your veterinarian.

The following exercise stimulates lifting of the base of the neck, sternum, and withers through pressure on the ventral midline between the forelimbs. These movements are essential for self carriage.

Sternal, withers, and thoracic lifting exercise:

1. Stand facing the horse’s side, just behind the elbow.

2. Apply upward pressure to the sternum (breastbone) in the middle of your horse’s chest, between the pectoral muscles. Gradually slide your hand back between the forelimbs and behind the girth line while maintaining a steady upward pressure.

3. The horse responds by initially lifting through the sternum and withers. Then as the pressure moves further back, he responds by lifting in the thoracic area immediately behind the withers, and finally in the thoracic area under the saddle.

Note: the amount of pressure needed to stimulate a response will vary between horses, so start gently and increase pressure gradually, or use a slow stroking action until the horse responds.

  1. Balancing Exercises

Balancing exercises improve balance and stability by inducing the horse to use active muscular contractions to shift the centre of gravity toward his haunches and/or to resist displacement of his centre of gravity. A horse uses his muscles in some of the balancing exercises to shift his centre of gravity, while in others, he uses his muscles to resist a shift. Many of the balancing techniques used in horses are similar to those performed in Pilates and yoga training in people.

The next exercise stimulates activation of the pelvic stabiliser muscles to maintain the horse’s balance.

Tail pull:

1. Stand to one side of the hindquarters.

2. Take hold of the horse’s tail, pull it toward you by flexing your elbow. (The goal is not to pull the horse off balance, but to stimulate resistance in the pelvic stabilizer muscles.) You’ll see the muscles around the stifle contracting as the horse resists the pulling force.

3. You can gradually increase the amount of force applied to the tail or the number of repetitions as the muscles get stronger.

Remember to check with your veterinarian before including such exercises into your horse’s training regimen; this is especially important if the horse is recovering from an injury.

Core training exercises can be done without a warm-up–for example, in horses that are recovering from injury–because the horse controls the amount of motion, and loading of the joints is less than during locomotion.

Five facts about a snaffle: There’s no hiding away from the effect of the bit in your horses mouth.

Facebooktwitterredditpinterestlinkedinmail

Bitting your horse is not to be taken lightly.  It is really important to understand how a bit functions in your horses mouth.  Lets start simple with snaffles.

Horse Scout Blogger was watching some babies out on their first competitive outing yesterday…. I love it, all starey eyed and long legs!! (well some of them anyway). This got me to thinking about the snaffle, and all its variations.  When you go into a tack shop and that multitude of variation set before you. An Aladdin’s cave; but only if you know what you are looking for and why. Knowing how the snaffle bit works is helpful in developing effective rein aids, and avoid either being ineffectual or too hard on your horse’s mouth. Although the basic action of most snaffle bits is the same, it sometimes takes trying a few different bits to find one your horse is comfortable with. After riding my mare in a French Link and finding her fussing with the bit, I changed to the loose ring, which was lighter, and seemed to be much more comfortable for her. Sometimes choosing the right bit, even if you are choosing among snaffles can take a bit of time.

1. Snaffle Basics

A snaffle bit has a straight or jointed mouthpiece with rings on each end of the mouthpiece. There are many different types of snaffle bits. However, the basic structure is the same for all, and the basic action in the horse’s mouth is very similar, with some subtle modifications. The snaffle bit is regarded as a relatively mild bit. The addition of variations can make it much harsher.

When the reins are pulled, pressure is applied to the area of the gums that have no teeth called the bars of the mouth. This gap is between the front teeth that crop grass, and the back teeth, that grind the food. A properly fitting bit sits comfortably within this gap, just forward of the grinding teeth. Occasionally, a horse will have problems carrying a bit comfortably this can be from small teeth called wolf teeth which may have to be removed.

2. How the Horse Reacts to the Signals

The simple snaffle applies pressure to the bars of the horse’s mouth. There is no pressure anywhere else on the horse’s head and no leverage comes into play as it does with a curbed bit or lever action (gag). When you pull straight back, the horse will understand that equal pressure on both sides of its mouth means to stop. A pull to the right, that applies pressure on the right bar, means turn to the right and a pull to the left, of course, means turn left. As you learn to refine your rein aids, combining them with using your seat and leg aids, you will learn to cue your horse for things like leg yields, half-passes, lead changes, changes of gait and other more advanced riding skills. While at first you may be simply ‘pulling’ the reins, you will in a short time learn to give much more subtle signals that can be felt by the horse, but are almost imperceptible to the average observer.

3. The Function of Bit Rings

The rings on a snaffle may be D shaped or have small piece sticking up or down like a full cheek snaffle and Fulmer snaffle. The rings may slide or they may be fixed to the mouthpiece. The shafts perpendicular to the mouthpiece on full cheek and driving bits prevent the bit from slipping through the horse’s mouth. Large leather or rubber type discs can be used to keep bit from chaffing the sides of the horse’s mouth as well. The rings can effect the weight of the bit and prevent the bit from pulling sideways through the horse’s mouth.

4. How Mouthpieces Differ

Bits with jointed mouthpieces will have a nutcracker effect, while straight mouthpieces spread the pressure evenly over tongue and bars. An egg butt snaffle will have oval rings, and the mouth piece will get thicker as it approaches the rings. These bits are amongst the most mild, because they distribute the pressure of the rein aid over a wider area of the bars. Generally the thicker the mouthpiece the milder the bit. However a horse with a large tongue or low palate might be uncomfortable in a bit with a thick mouthpiece. The French link is considered the mildest jointed snaffle. The Dr. Bristol, although it looks very similar, is much more severe, because of the way the plate in the middle of the bit lays in constant contact with the tongue—either flat or on an angle, depending on how the rider attaches the bit to the bridle.

5. Variety

Snaffles can be hollow to reduce weight, flexible, twisted, jointed with one or more links, have keys or rollers, be squared or oval, or have any combination of shapes and joints. Mullen mouth bits are the same width from end to end. Wire bits are quite thin and wire wrapped bits add to the sharpness of the pressure on the bars of the mouth. All of these variations are intended to enhance the rein aids. Different metals and material can be used to encourage the horse to accept the bit for its taste or encourage salivation. Copper, sweet iron, vulcanite and other synthetics can be used. Some bits, often used for teaching a young horse to hold the bit, are flavored.

Snaffles are often the first bit a horse will carry. Many will be ridden throughout their entire lives with a snaffle bit.

How to compete using a “Class Ticket”. Tried and Tested, Job Done!

Facebooktwitterredditpinterestlinkedinmail

Yesterday Horse Scout Blogger spotted that you could get a free class ticket on the British Dressage facebook page but “What are class tickets?”

By buying a class ticket, you can enter one British Dressage class without being a member or having a registered horse. You can use class tickets to compete and will be eligible to win rosettes and prize money, but will not receive BD points or qualification, except for Area Festivals and Combined Training Championships. If a rider using a class ticket wins a qualifier other than those specified above, qualification will pass to the next eligible competitor. You can buy a class ticket from the British Dressage Web site. These are also available in the competition section of this website. You will need to pay the usual class entry fee and abide by British Dressage Rules rules.

British Dressage say: Much more than just a ticket to compete!

If you are already competing in unaffiliated dressage competitions and want to get more involved in this fantastic sport then British Dressage is the place for you! Much more than just a ticket to compete, BD, the National Governing body for the sport in the UK, is a nationwide club for all things dressage, offering training, competitions, information and social opportunities for all. Your horse can earn nationally recognised BD points and you can qualify to take part in prestigious Championships or Festivals.

Most of all affiliated dressage is accessible. Complete competition schedules and lists of training days arrive on your doormat every two months as part of BD magazine. The BD website also carries this vital information (and much more!), and staff at the BD office are on hand during office hours to answer any queries you have. From where to go and what to wear, to competing internationally and representing your country – British Dressage is working to help you get the most out of your sport.

Getting Started

All affiliated shows are open to the public and the major championships are excellent opportunities to see the best at all levels and particularly the nation’s dressage celebrities competing for prestigious national titles. You may also want to go along to your local affiliated venue to check out the facilities and the competition!

You can get a taste for affiliated competition without becoming a full BD member by using class tickets available through the BD shop or by entering Prelim classes.

Class tickets cost £8 each and each ticket allows you to enter one affiliated dressage class without being a member or having your horse registered. You can win rosettes and prize money but you will not receive BD points or any qualifications. You can also use Class Tickets to gain the score sheets needed to qualify to enter an Area Festival.

More information about class tickets here

KEY FACTS – BEF BASIC BIOSECURITY INFORMATION SHEET in respect of transmittable Equine Herpes Virus

Facebooktwitterredditpinterestlinkedinmail

Its Spring time, more horses are out and about, travelling around the country and meeting in groups.  Last year there were cases of Equine Herpes Virus reported in Southern UK.  It is good to know what you are looking for.

To safeguard the horse population within an establishment the British Equestrian Federation recommend that the following basic steps are taken:

You should also be aware of disease prevention, identification and hygiene procedures.

Vital Health Signs

The following are a set of vital signs for the normal healthy horse and appropriate examinations for general health:

ü  Temperature 36.5-38.5C

ü  Breathing rate 8-15 breaths/min

ü  Heart rate 25-45 beats/min

ü  Look for eye or nose discharges

ü  Observe how the horse is standing

ü  Check for consistency and number of droppings

ü  Check consumption from water buckets and feed bowl

ü  Assess horse’s general demeanour

We recommend good records are kept in the yard diary and that rectal temperatures are taken twice daily (asit is a very good indicator of disease)

Biosecurity

  1. Isolate new arrivals for a period of 10 days or introduce horses from properties with a known high health status only. Isolate and pay particular attention to horses from sales /competition complexes, from unknown mixed population yards and those that have used commercial horse transport servicing mixed populations.
  2. Verify the vaccine status of new arrivals.
  3. Keep records of horse movements so that contacts can be traced in the event of a disease outbreak.
  4. Regularly clean and disinfect stables between inmates and also clean and disinfect equipment and horse transport between journeys. Remember to remove as much organic material as possible before disinfection.
  5. Maintain good perimeter security for your premises and maintain controlled access for vehicles and visitors.
  6. Ensure that everyone understands the hygiene principles and thereby do not pass disease to horses at other premises
  7. Eliminate the use of communal water sources. Instruct staff not to submerge the hose when filling water buckets
  8. Horse specific equipment (feed and water buckets, head collars etc) should be clearly marked as belonging to an individual horse and only be used on that horse.
  9. Any shared equipment (lead ropes, bits/bridles, Chiffneys, twitches, thermometers, grooming kits etc) should be cleaned of organic debris and disinfected between horses.
  10. Equipment that cannot be properly disinfected (like sponges or brushes) should not be shared between horses.
  11. Cloth items such as stable rubbers, towels, bandages etc should be laundered and thoroughly dried between each use disinfectant may have to be used as part of the rinse cycle, e.g., Virkon.
  12. Isolate horses at the first sign of sickness until an infectious or contagious disease has been ruled out.
  13. Contact your veterinary surgeon if any of your horses show clinical signs of sickness.
  14. Do not move sick horses except for isolation, veterinary treatment or under veterinary supervision. Attend to sick horses last (i.e., feed, water and treat) or use separate staff.
  15. Provide hand washing facilities and hand disinfection gel for everyone handling groups of horses and provide separate protective clothing and footwear for those handling and treating sick horses.
  16. The isolation/quarantine unit should have a changing area for staff so that clothing and footwear worn in the restricted area are not worn elsewhere.
  17. Barrier clothing, waterproof footwear and disposable gloves should be used when working with sick and in-contact horses and after use they should be disposed of or laundered and disinfected.
  18. When using disinfectants, always follow the instructions on the label. Select a Defra approved disinfectant and chose from the general order disinfectants that have documented effectiveness in the presence of 10% organic matter, works in the water hardness of the locale and is safe to use in the environment of horses and people. www.archive.defra.gov.uk/foodfarm/farmanimal/diseases/control/disinfectants.htm
  19. Stables, mangers and yards should be kept clean, free of standing water and thoroughly scrubbed and cleansed with an appropriate detergent/disinfectant after use and then allowed to dry.
  20. Take care when using pressure washers as those set at greater than 120psi can produce aerosols that spread infectious agents through the air.
  21. This document was compiled by The BEF and World Class Programme they have passed their thanks on to Clive Hamlyn MRCVS and the National Trainers Federation www.racehorsetrainers.org for their help in producing this document.

Making the right shapes in the show jumping arena – 8 different approaches to perfecting your horses jumping.

Facebooktwitterredditpinterestlinkedinmail

Horse Scout Blogger has been contemplating show jumps this weekend.  Each type of jumps asks for a subtly different approach and energy.  In order to feel confident in the arena it’s a good idea to understand what question each style is asking of your horse and also its important to teach your horse how to jump the different fences to improve your show jumping.

1.  Ground poles

Really boost your horse’s bascule by using ground poles to create a wider fence base – he’ll instinctively know what to do. Without a ground line a fence becomes more advanced, drawing your horse in close, making it harder for him to jump well and get his legs out of the way in time.

You can also make a V-shape with ground poles before fences to channel your horse’s energy on approach, helping produce a much better jump.

2. Cross-poles

A great warm-up and schooling fence, cross-poles help your horse start to open up and use his shoulders. The V-shape encourages him to come centrally to the fence, tuck his knees neatly up and to look at what he’s being asked to jump. The taller the cross-pole, the more it will improve his action, as he works those shoulders and really lifts up.

3. Vertical

A vertical (or upright) is made of poles in the same vertical plane, and encourages your horse to make a taller, rounder shape in his jump. The take-off and landing spots will be the same distance away from the fence, so your horse will make quite a steep shape into it, lifting his shoulders higher vertically and tucking his forelegs up and away quite quickly.

4. Fillers

Fillers are great for getting a round shape in your horse’s jump, and by creating an illusion of solid colour he’ll really look at what he’s facing. They’re great for a bold horse because they demand respect, but if he’s lacking in confidence, fillers can make a fence harder to ride.

5. Planks

Planks work the same way as a vertical, creating a tall, steep jump shape, but they’re easier to knock down as they sit on flat cups. Planks create a more solid-looking fence, so your horse may back off a bit, and even produce a bigger jump, and as they tend not to have a ground line, they’ll draw him in quite deep, so he needs a more powerful jump to clear them!

6. Triple bar

Made with three poles of ascending height, triple bars create a longer, more open jump. Your horse really has to stretch and lift his front end to clear them, and they can be challenging when linked with other fences. Because their width requires more power, your horse will come deeper into the fence before take-off and land further out than normal, so if you’re working out your strides to the next fence keep this in mind.

7. Oxer

Two parallel vertical fences form an oxer, creating a spread that gets horses up in the air, producing a rounder, more equal shape than a triple bar encourages with take-off and landing spots the same distance from the fence. Because of the power your horse uses to push himself up and over, he may run on a little on landing, or lack energy because he used it up in the air.

8. Liverpool Oxer

A Liverpool is a vertical or oxer with a ditch or large tray of water underneath. The tray makes your horse look at the fence (which can cause his head and neck to drop as he approaches) then encourages him to get up in the air, creating a large, round jump.place the tray in front of the fence and it mimics the effect of a triple bar, encouraging a wider, more open jump which rises gradually. Place the tray under the fence or out behind it and your horse will draw deep into the fence, producing a more upright take-off and more reach as he lands. If you don’t have a water tray, you can create the same effect by laying something on the ground beneath a fence such as a rug.

This great advice comes from show jumper Mia Korenika who explains how different fences and elements can help your horse become a more athletic, careful jumper.  Use this link to check out her facebook page.


Finding the right producer for your baby- give your horse the best start to his career

Facebooktwitterredditpinterestlinkedinmail

Working with young horses, understanding how they function, anticipating how they will react and being aware of their needs is a skill and a calling.  Not every professional rider wants to start horses but those that do offer a service which is invaluable to you and to your horse. Horse scout has number of professionals who list breaking and producing among the services they offer.

Key advantages in asking a professional to start your horse for you.

  1. They have experience in this specialist area.
  2. They have started all sorts of youngsters and know what to expect.
  3. They treat each horse individually
  4. They follow a set routine (which is progressed and adapted to suit any one particular horse)
  5. They know how much to ask
  6. They know when to back off
  7. They know when to push forwards with training.
  8. They take the sudden and sometimes explosive reactions in their stride
  9. They understand which behaviors are reactions to the training and which may indicate problems
  10. They are successful because they are experienced and skilled at their job.

Using a professional for this key first stage in a horse ridden career can make all the difference to your relationship with your horse.  It is easy to let a horse scare you when you are unsure or inexperienced and it is just not worth the risk to you or your horse in terms of your mutual relationship.

There are, however, things which you can do to help prepare your horse:

It is always more effective to train through positive reinforcement and respect rather than using force, which only creates fear.

A horse which respects and trusts you will follow commands better and be a more enjoyable companion than a horse that fears you. However gaining respect is not always a simple scenario and has many facets. Knowing how to interact with your horse is the key in training. Here are some steps to bear in mind if you’re handling a young horse which will prepare him for life in general as well as pre formal breaking- in training.

Respect Is Mutual: Gain Their Trust

The first step to training a horse is creating and maintaining a bond of trust. If your horse doesn’t trust you it will be near impossible to train into being a calm and content riding horse. Grooming is a great way to create a connection between you and your horse. It is soothing and relaxing and is a bonding act within the herd itself. As with any animal you should talk to your horse so it knows your voice, if you frequently talk to your horse it will associate your voice with being a safe command or soothed so make sure to talk sensibly to your horse when trying new things, or going into new places or where he becomes spooked by a noise, object or strange feel……like the water from a hosepipe or a plastic bag in your hand or in the hedge.

Introduce Equipment and Gear Slowly

It’s important not to overwhelm your horse so introducing equipment slowly is a sensible way forward. Horses must first become familiar with common equipment such as bits, brushing boots, travel boots or even maybe the saddle. Introduce the gear slowly by placing it on them for short intervals at a time and gradually building up their use with shear repetition and patience. Rugs are one thing that will become a common place article, used on a daily basis. Always put on from the front to the back and take off by undoing the rug from the back to the front. That way it will never slip back and tangle in their legs. Good old fashioned common sense at all times.

Show Him the World

Don’t hide your young horse away……….Let him see and get used to all the things he will have to cope with as a ridden horse. Spend time in hand safely grazing your horse near a road so he can see and smell and hear all the traffic and comings and goings. The more solid you make him out here the easier and better he will train later on.

Travel train him! Get him used to the trailer…….don’t wait till the day he has to go somewhere. Spend some time feeding him on the ramp and then inside the space. Take him for short journeys when you don’t need to.


Horse Scout has Four professional, newly signed up, who specialize in breaking and producing young horses are:

Claire Rowland– Harrogate

Selina Milnes nr Bristol

Lorna Riley in Durham

Emily Llewellyn in Surrey

How often do you think about your horses nose?

Facebooktwitterredditpinterestlinkedinmail

Horse Scout Blogger was thinking about the way a horse wriggles his nose in your hand. It’s a funny feeling and somehow very friendly. We all know a nose is for breathing and for smelling but horses use their noses for other things too!

1.Exploration

Horses use their lips the way people use their hands—to touch, explore, and sense the world around them. Horses engage in mutual grooming, and he might be putting his nose by yours to invite you to scratch his nose or groom his face. A horse who puts his nose in your face may be trying to use his mouth to gently touch you, the way he might greet another horse.

2. Affection

Another reason horses put their noses in your face is to show affection. Horses show affection for one another by gently blowing into each other’s nostrils, and your horse may be trying to show affection for you as if you were another horse. Mares nuzzle their foals, and reaching out to touch your face may be how your horse says “I love you” in a similar way.

3. Sight

Horses have different fields of vision from humans, and they often move their heads simply so they can see better. A horse has binocular vision to the front but a blind spot directly in front of his nose. He may be moving his head closer to yours so he can get a better look at you if you’re in his blind spot.

4. Learned Behavior

Horses may also duck their noses to your face if they’ve learned that people bring them treats. In their eagerness to get treats, they may move quickly into your space. They may also have learned along the way that such behavior is rewarded with affectionate pets or scratches. Unless this behavior bothers you or turns into nipping, it’s usually fine. To get a horse to stop doing this, tap him on the chest to get him to back up.

Be cautious about strange horses putting their noses to your face and never encourage this behavior. Horses do have big teeth. I know a lady who got her nose bitten off when she used to feed her horse carrots from her mouth.

Be an efficient and effective rider. 10 Top Tips – Core strength, mobility and suppleness will make you ride better

Facebooktwitterredditpinterestlinkedinmail

How effective are you in the saddle.  Have you ever tried to tune in to what is happening under your saddle? Are you aware of the exact response from the horse to any given movement by you?

Are you a bit fuzzy on how the whole thing actually works. You know the basics, you ride inside to outside, you sit centrally in the saddle with subtle changes in weight reflected in the movements of your upper and lower body.  Legs controlling behind, shoulders the front and your core the power house creating energy, swing, impulsion, and lastly your seat providing a stable point from which to perform all this with a set which is light, mobile, agile, and controlled.

All this without even thinking about your spot on timing and direct ion, cadence, pace, suppleness and balance from your horse.  So much to think about all at once. Sometimes it’s easier to forget that there is a horse under you and concentrate on recreating the correct body shape needed to make efficient and accurate aids.

You can go a long way to helping yourself become efficient and effective in the saddle if you are fit and agile.

The key to being a effective rider starts on the ground.  You need to be fit.  Riding and mucking out  (unless you are one of our professional riders and trainers) is not enough you need to get out and to aerobic sports like running and swimming, fitness classes or dancing.  Dancing is very good for a rider as it helps with a sense of erythema and makes you agile at the same time.  However key to all progressive riding is being strong and mobile in your core.  Here are a few simple exercises which can help you start to strengthen you central core/abs.  As always with any fitness advice if you experience pain then you must consult your doctor before progressing further.  Taking part in fitness classes may be a way to get you motivated.  There is nothing better than the thought of thinking people will notice you haven’t been doing your ‘homework” to get things moving along a pace!

However if you want some exercises you can do at home with a minimum of equipment her are five simple ones to start you off.

1. Reverse Crunch with Resistance Bands

Targets: transverse abdominals

Lie on your back with your knees bent, arms down by your sides, holding one end of a band in each hand, with the band wrapped around tops of shins. Raise your knees toward your chest until your hips leave the floor. Hold for 3 seconds; lower to start. Repeat for 2 sets of 10 reps.

2. Knee-Ups

Targets: rectus abdominus

Brace yourself between the backrests of two sturdy chairs, keeping elbows slightly bent, shoulders down, neck relaxed, head and chest lifted. Keeping your abs tight, exhale and then very slowly bring your knees to your chest without swinging back and forth. If your form falters, try raising one knee at a time. Build up to 3 sets of 15 reps.

3. Leg Swings

Targets: obliques

Lie on back with arms out to sides, legs and feet pointing up. Exhale and draw navel in toward spine as you lower legs to left side about 5 inches from floor. Return to start and repeat on right side. Keep switching sides for a total of 15 reps. Work up to 3 sets.

4. Ball Leg Lift

Targets: transverse abdominals

Lie facedown on a ball and roll forward until your hands are on floor and just the tops of your feet are flat on ball. Keeping your back and right leg straight, slowly lift leg a couple of inches toward the ceiling. Hold for 3 seconds, then lower. Do 10 reps, then switch legs. Add 2 repetitions each week as long as you can maintain perfect form.

5. Butterfly Crunch

Targets: rectus abdominus (“six-pack”)

Lie on your back with the soles of your feet together as close to your body as possible, with knees bent out to sides. Place hands behind your head, elbows in line with ears. Keeping your back flat on floor and stomach muscles contracted, exhale and curl your chest up a few inches off the floor toward your legs. Lower to start. Repeat 10 times.

6. Side to Side

Targets: obliques (sides)

Lie on your back, knees bent and feet flat on the floor, with your arms at your sides. Exhale and contract your abs as you slide your right hand toward your right foot. Your head and neck should remain aligned and your lower back pressed to the floor. Return to start, then switch sides. Repeat 15 times.

7. Front Plank

Targets: transverse abdominals

Start on your hands and knees. Keeping your back and ab muscles contracted, drop down to your forearms while extending legs out behind you so you are resting on the balls of your feet. Be sure to keep your back straight, hips up, and neck relaxed. Hold for 3 seconds, then return to start. Repeat 10 times.

8. Fingers to Toes

Targets: rectus abdominus

Lie on your back with your legs straight and extended toward the ceiling, with arms down by your sides. Exhale and contract your abs as you crunch up from your waist and extend your hands toward your toes. Keep your back flat on the floor. Work up to 2 sets of 15 reps.

9. Scissors

Targets: obliques

Lie on your back with your fingers resting behind your head. Keeping your abdominals tight, raise your left knee and touch it to your right elbow. Return to start, then raise your right knee and touch it to your left elbow. Alternate for 15 reps in a smooth, continuous motion, keeping abs engaged and hands relaxed so you don’t pull on your neck. Work up to 2 sets.

10. Obviously don’t do all of these at once!! Work through the list joining on new sets as you get stronger.  Do not perform moves badly.  Stop and rest of do fewer repetitions until you are ready to move on.